How to add a FloDesk Form to Your Showit Website Template
FloDesk is an email marketing platform that allows you to design and send visually stunning, on-brand emails to your audience. With pre-designed email templates and customization options, you’ll never get stuck designing an email again. Plus, we’re hooking you up with a ton of free templates! Click HERE to access your free templates.
JUMP TO
- Decide the Placement of your Opt-In in Showit
- Create a FloDesk Form
- Embed the FloDesk on your Showit website
- Adjust & Publish your form Live
How to add a FloDesk Form to Showit

Step 1: Decide Where to Place your FloDesk Form
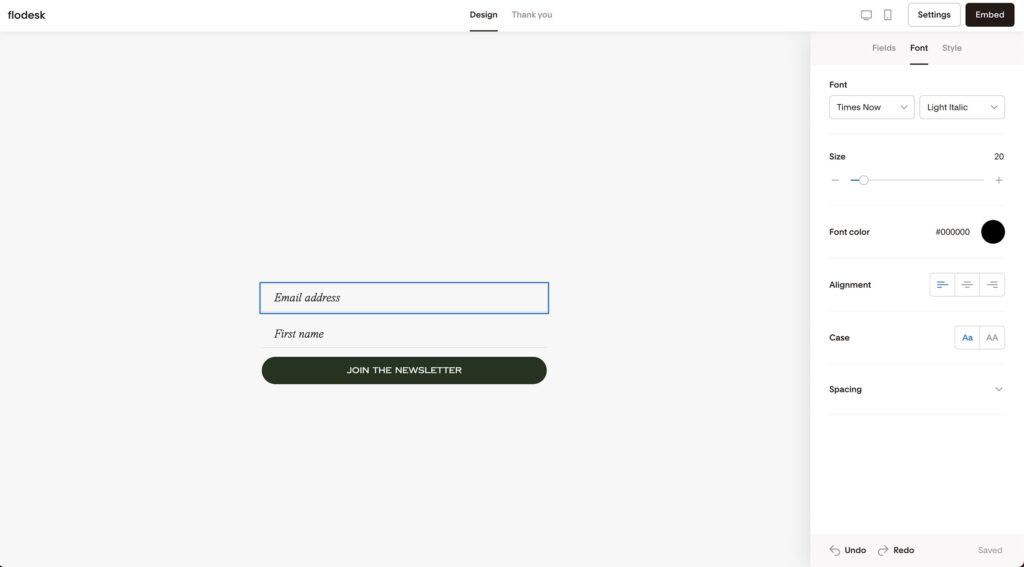
First, decide where you’d like to place your form within your TONIC design in Showit. For example, we’re using our Fitzgerald template, which has a beautifully designed “Join the Newsletter” section on the homepage. All TONIC designs include opt-in sections, for which, these same steps can be applied to integrate a FloDesk form. You can replace the placeholder content (First Name, Last Name, and Email) with a FloDesk form to capture leads in FloDesk from your website.

Step 2: Create a FloDesk Form
Next, if you don’t have a FloDesk account yet, sign up and log in.
Once you’re in, create a new form.
FloDesk lets you add custom fonts and colors, which allows you to design a form that seamlessly integrates with your Showit template. You can refer to the design settings within Showit to match the fonts and colors of your website template when styling your form in FloDesk.
Step 3: Embed the Header Code from FloDesk
Once your form is styled, you can embed your styled FloDesk form into your website in Showit.
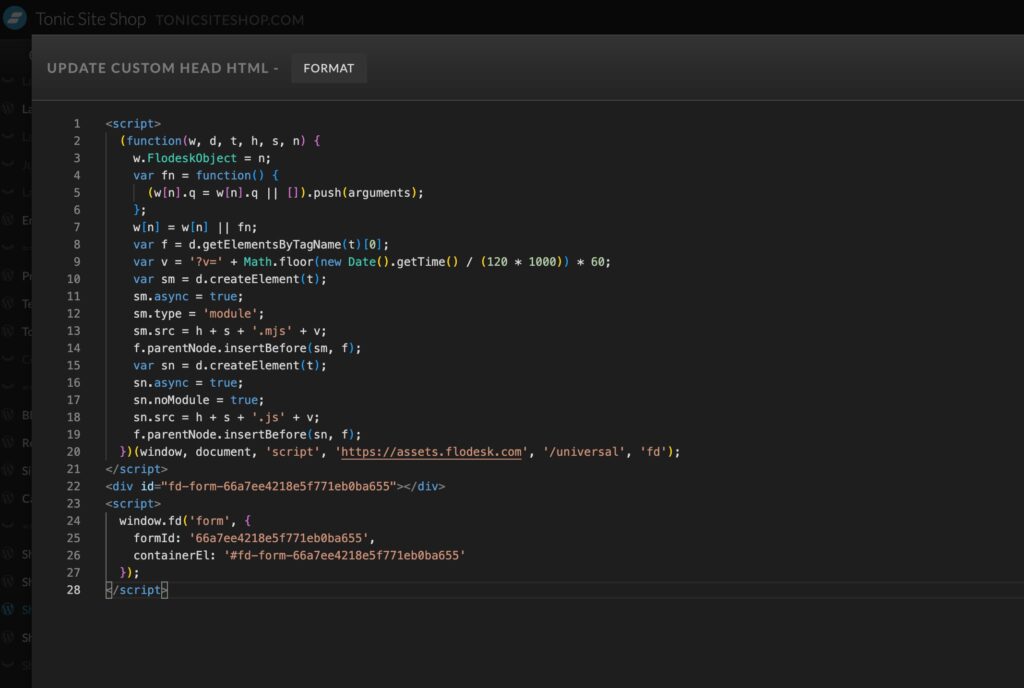
To do so, click the “Embed” button on your form in FloDesk. FloDesk provides two sets of codes: (1) header code and (2) inline code.
First, you will copy the header code, toggle back over to your Showit dashboard, remove the existing Showit form fields, and click on the “Elements” icon at the bottom center of Showit. Click on the “Embed Code” option in your Showit dashboard and paste the header code in the box.
Once the header code is in place in Showit, you need to add the inline code. To do so, toggle back to FloDesk and copy the inline code. Then, return to Showit, hit “Enter” to create a new line in the same embed code box, and paste the inline code. Click “Save.”
Step 4: Adjust the Embed Code Box in Showit & Preview
To finish, with both sets of code embedded, you will see your FloDesk form appear in Showit. You will need to fine-tune your embed code box by adjusting the size of the embed code box to fit your layout and center the form as needed on the page. Once you’re satisfied, click “Preview” in Showit to see your new form on your website. When you’re ready to go live with this update, hit “Publish,” your opt-in form will be synced with your FloDesk account.
Conclusion
Adding a FloDesk form to your Showit website streamlines your opt-ins. You can easily duplicate this process between Showit and FloDesk for any number of opt-ins/freebies you want to create. Embedding your FloDesk forms directly into your Showit website not only helps you build your list but also helps you stay organized and know where each of your leads came from.
Flodesk