How to Integrate Shopify Buy Buttons into Your Showit Website Template
Shopify Buy Buttons allows you to add a customizable shopping experience to your Showit website with ease. Whether selling a digital product like an eBook or a physical product, the Buy Button simplifies the process by embedding shopping cart and checkout functionality directly into your Showit pages. This is hands down the easiest way to sell both digital and physical products using your Showit website. Here’s how you can integrate Shopify Buy Buttons into your website to start making sales right away!

JUMP TO
- Set up Shopify & Activate the Buy Button Sales Channel
- Create the Shopify Buy Button
- Customize the Shopify Buy Button
- Add the Shopify Buy Button to Showit
Step 1: Set up Shopify & Activate the Buy Button Sales Channel
To set up and add your Shopify Buy Buttons, you need to create a Shopify account. Once you create your account, log in and head to your Shopify Dashboard. First, you need to activate your Buy Button Sales Channel. This feature allows you to generate Buy Buttons for your products.
Step 2: Create the Shopify Buy Button
Once your Buy Button sales channel is activated, you can create your Buy Button. To do so:
- Navigate to the Buy Button section in Shopify.
- Click on Create a Buy Button.
- Choose Product Buy Button from the options, as the focus of this tutorial is on adding buttons for individual products.
- Select the product you want to sell—in the video, we use the Athens Travel Guide as an example.
- Click on Select to confirm your product choice.
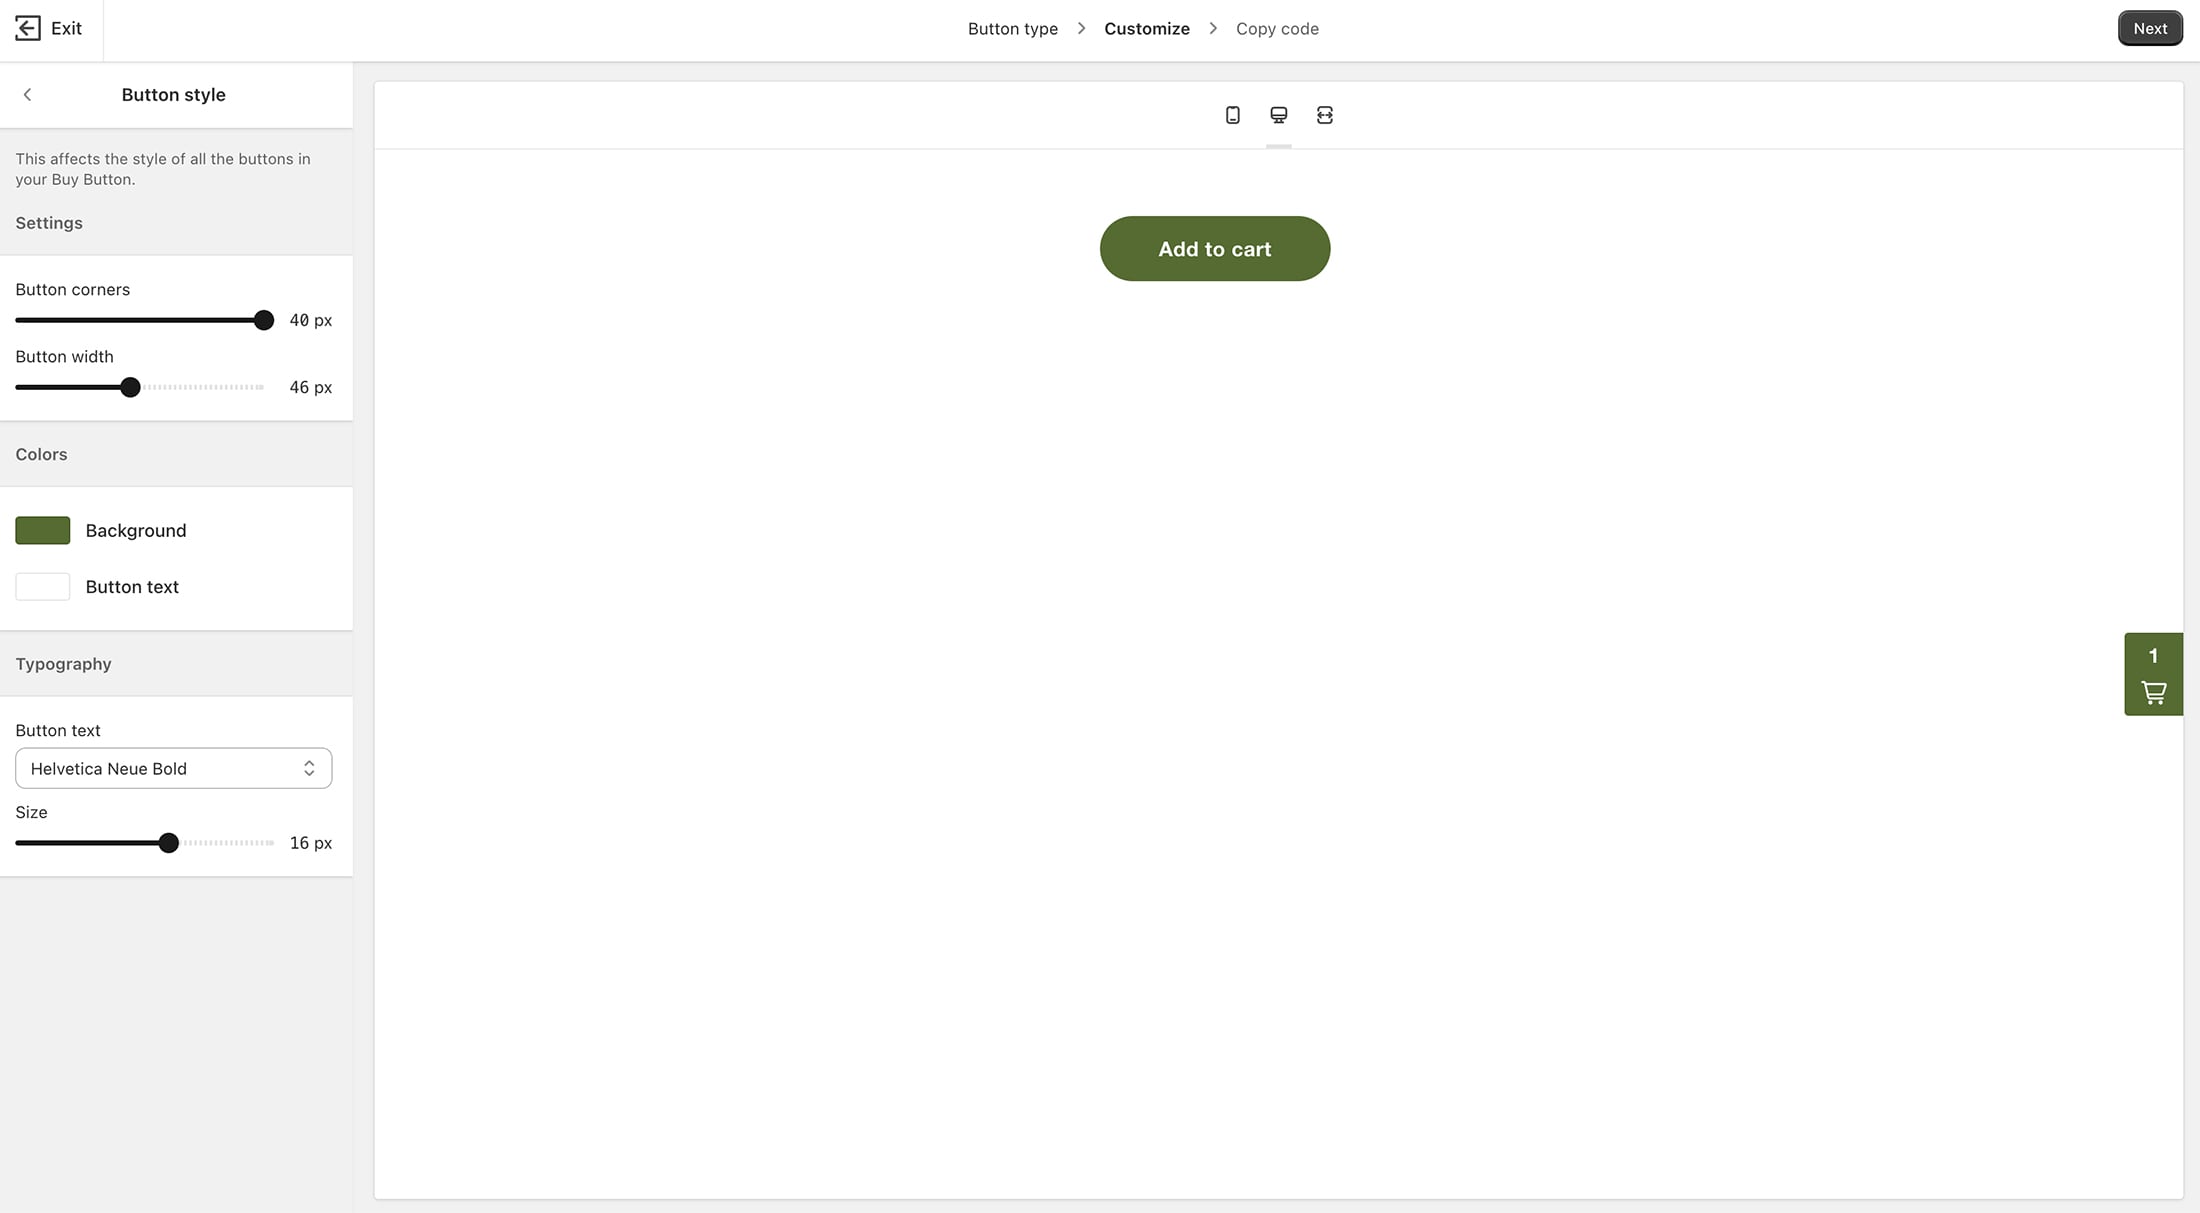
Step 3: Customize Your Shopify Buy Button
Once you select the product of your choice, Shopify allows you to customize the appearance of the Buy Button to match your Showit website template. You can adjust the button’s style, layout, and color to fit your design preferences.
You can repeat these steps to customize the shopping cart feature as well, ensuring that both your buy buttons and shopping cart integrate seamlessly with your website’s overall design.
When you’re finished customizing the buy button and shopping cart, click “Next.” This will generate the embed code for the Buy Button.
Step 4: Add the Shopify Buy Button to Showit
With the embed code copied from Shopify, it’s time to add it to your Showit website. Toggle over to Showit and select the product page you’ve created. Next, add an Embed Code Box to the page where you want the Buy Button to appear by selecting the “Elements” icon at the bottom center of Showit. Click on the “Embed Code” option in your Showit dashboard, and paste the Shopify code into the box, then click Save.
Once saved, you’ll see the Buy Button appear in the embedded code box on your Showit product page.
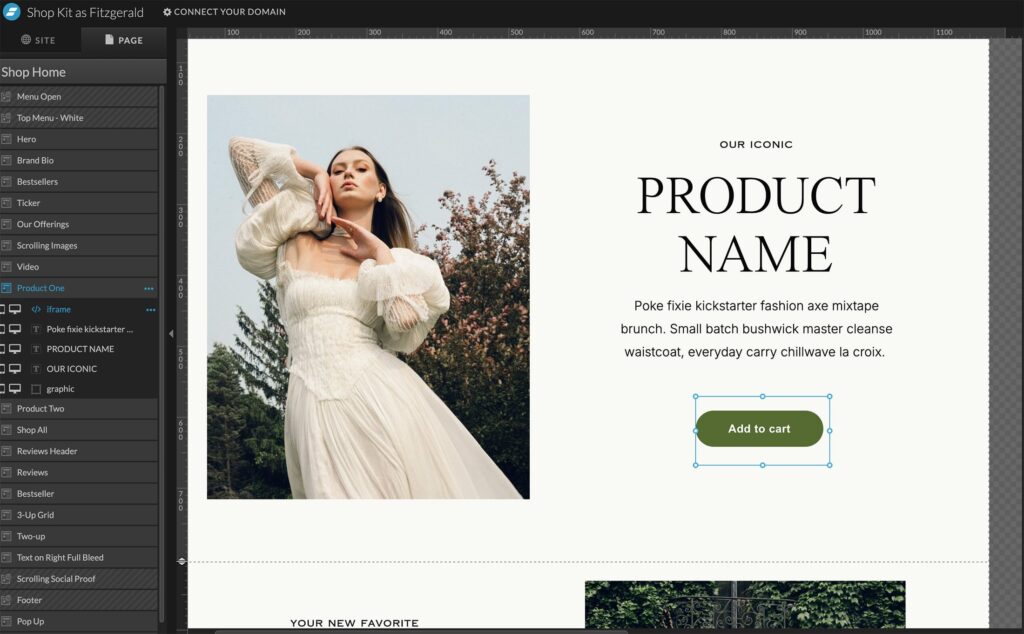
Finally, there are two options when it comes to the overall refinement and styling of your Shopify Buy Button within Showit: (1) Use the Shopify Buy Button As Is or (2) Layer the Shopify Buy Button Over a Button Styled in Showit.
To use the Shopify Buy Button as is, simply delete any button you’ve already designed in Showit and let Shopify’s Buy Button take center stage. Move the Shopify Buy Button into place on the page and preview the changes.
Or to use a button already designed in Showit, place the Shopify button directly over it:
- Select the Embed Code Box.
- Go to Effects in the right-hand menu and reduce the opacity to zero. This keeps the Shopify button functional but allows your custom-designed Showit button to remain visible. Once your invisible Buy Button is in place, move it over your custom-designed button and preview the changes.
When you’re ready to start selling, hit “Publish” on your Showit website template, and you’re ready to sell!
Conclusion
Utilizing Shopify Buy Buttons is the easiest way to integrate shopping cart functionality into your Showit website template. This setup gives you the flexibility of Shopify’s powerful e-Commerce tools while maintaining your beautifully designed Showit site so you can start selling today!
Shopify