How to Add Calendly to Your Showit Website Template
Calendly is a popular online appointment app that allows your customers to book a call directly from your website. Embedding your Calendly event into your Showit website makes it easy to streamline bookings while elevating the clients / customers experience to do so.

JUMP TO
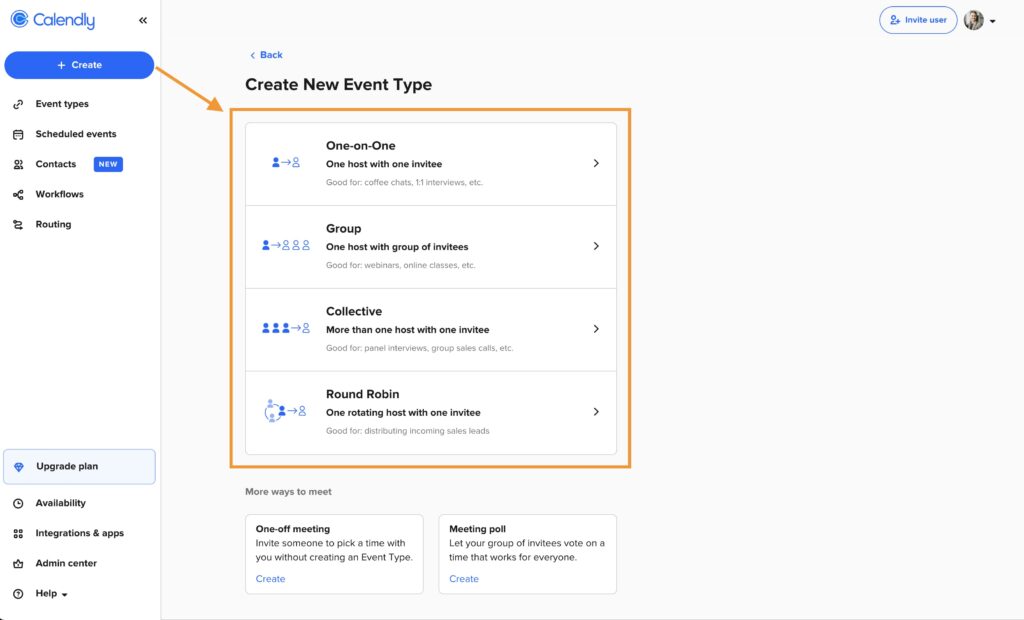
Step 1: Create an Event in Calendly
Create your Calendly account, and log in. To create an event, click on “Create” and “Event Type,” to define the type of meeting you want people to be able to schedule through your website.
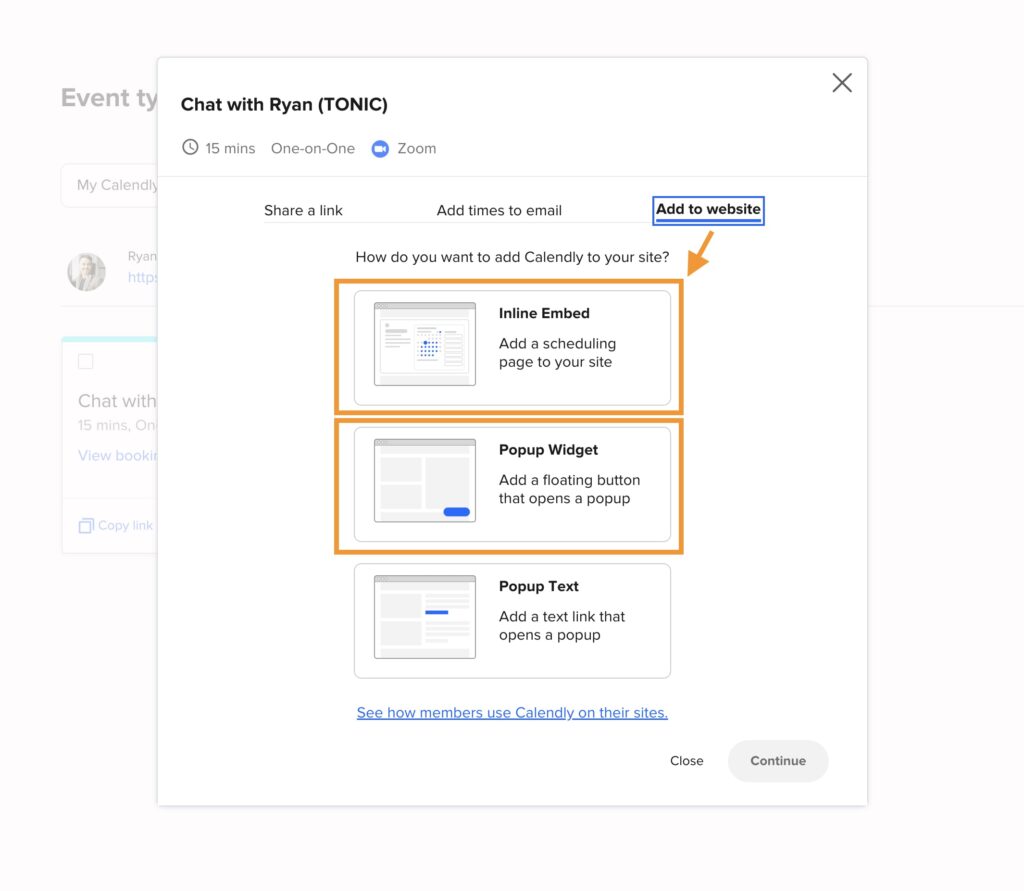
Once your event is created, you’re ready to add your booking calendar to Showit. To do so, click “Share,” then click on “Add to Website.”
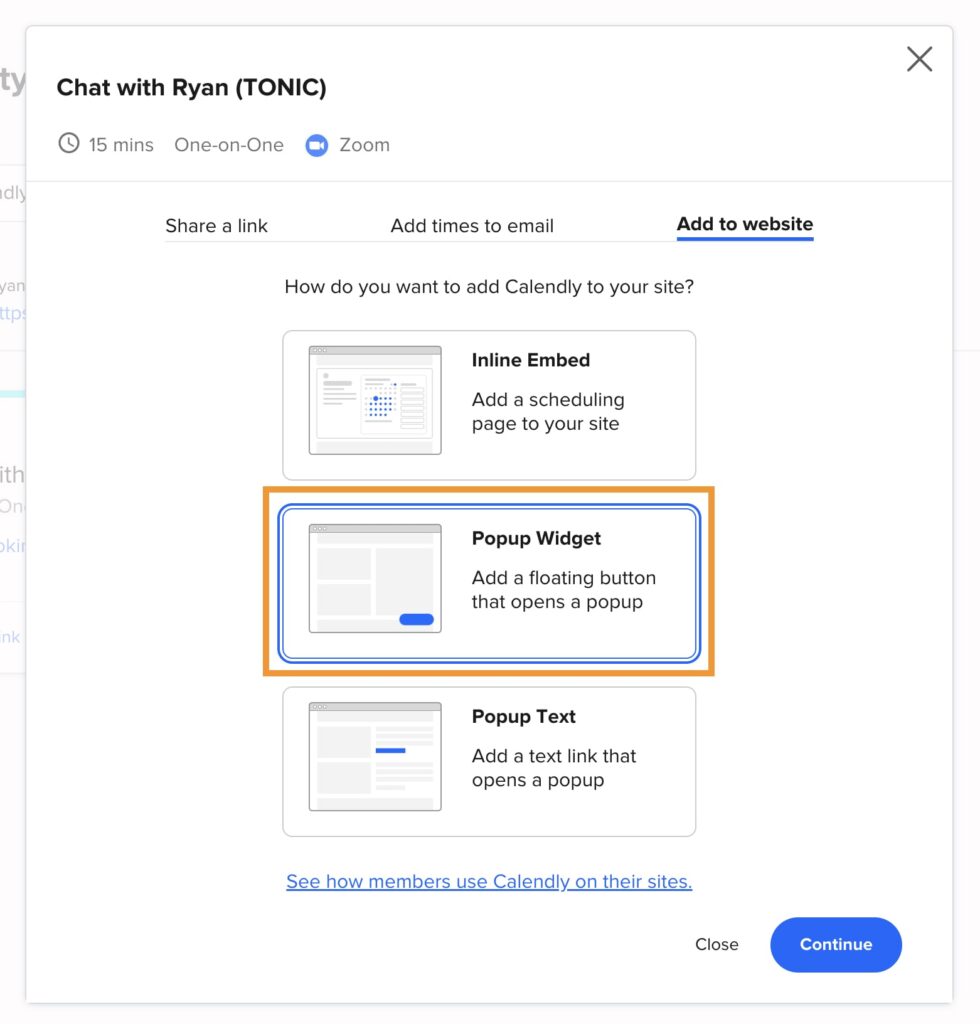
There are several different ways to add the calendar to your website. The most popular are “Inline Embed” and “Pop-up Widget”.
Step 2: Embed Calendly on Your Showit Website
Click on “Inline Embed” and hit “Continue”.
Adjust the design settings within the Calendly event to match your branding (if you have the upgraded Calendly account). Once you adjust your design settings (or opt for the default settings), click on “Copy Code”.

Next, log in to your Showit account, and open your website design. Create a “Book a Call” page by duplicating the “Contact” page in your design. Rename the new page, “Book a Call”.
Update the “Book a Call” page within Showit to include content that reflects the type of event your clients / customers can book, and delete the contact form that’s in the canvas.
Next, click on the “Elements” icon at the bottom center of Showit, then click on “Embed Code.” Position the embed code box on your page and resize it accordingly. You can always adjust the size of the embed code box after adding your code.
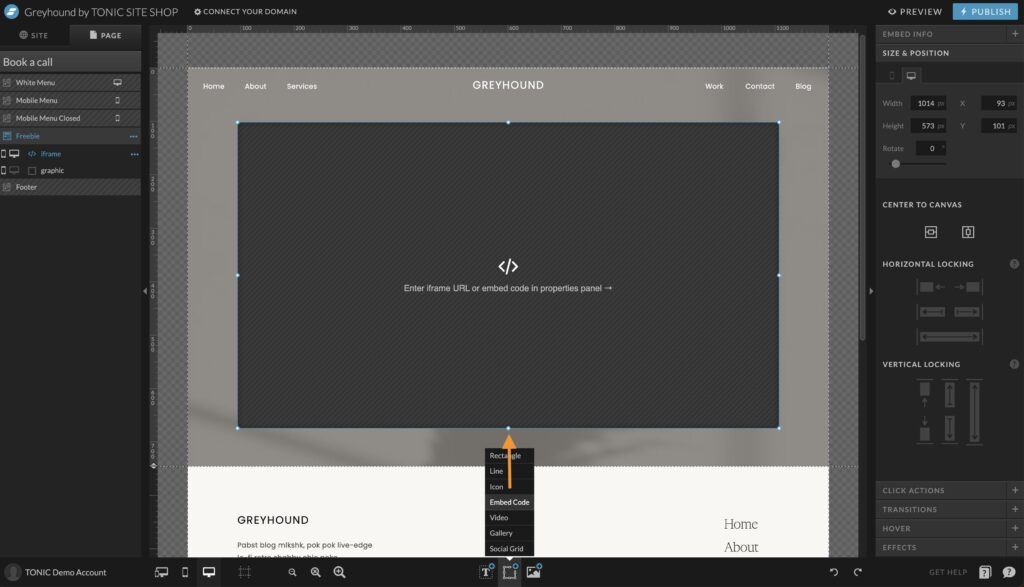
Next, double-click on the embed code box and paste your Calendly form code, then click “Save.” The Calendly form will populate into the embed code box within Showit.
Adding a Calendly Pop-Up Widget to Showit
Click on “Pop-Up Widget” and hit “Continue.”
Adjust the design settings to match your branding (if you have the upgraded Calendly account). Once you adjust your design settings (or opt for the default settings), click on “Copy Code.”
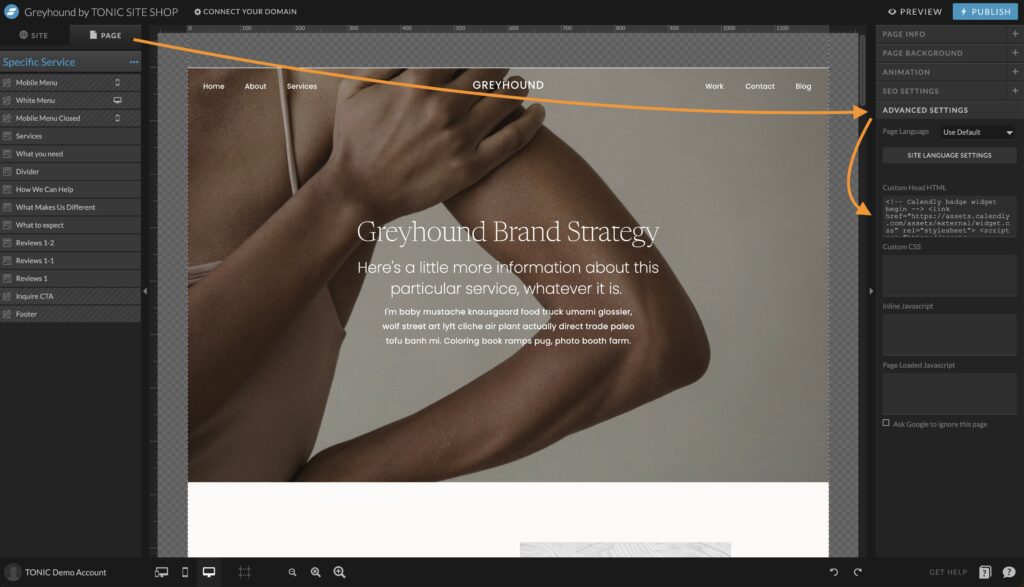
Next, log in to your Showit account, and open your website design. Click on the page where you’d like the Calendly pop-up to appear. Then toggle to the “Page” tab and ensure you have the Page Title selected (it will appear blue when selected).
Find the “Advanced Settings Tab” and then “Custom Heading HTML.” Paste the code and click save.
Conclusion
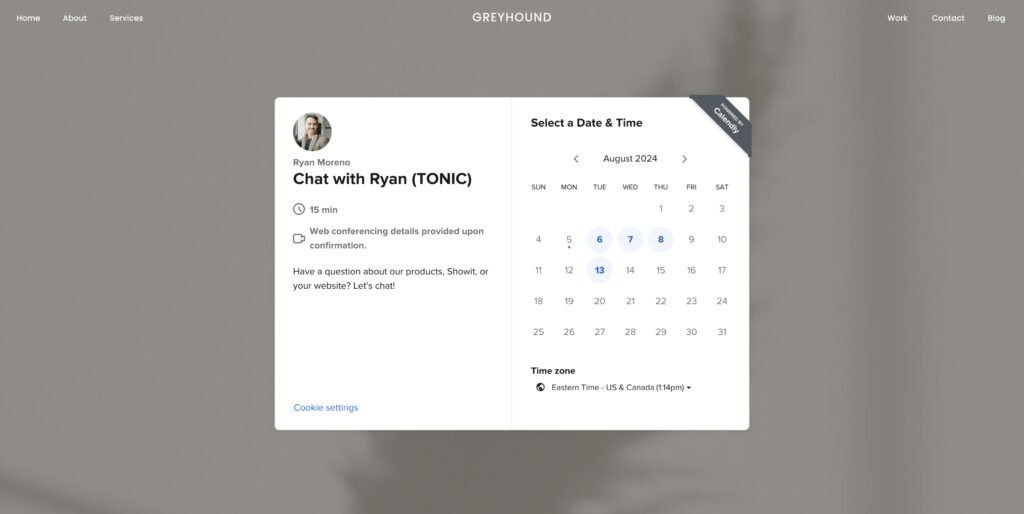
Adding a Calendly booking calendar to your Showit website is simple. Showit allows you to have a streamlined booking page integrated directly with Calendly to keep your appointments organized. This also ensures the booking process is easy for your clients / customers! Using Calendly and Showit is a great option as it prioritizes your client / customer experience when it comes to booking calls or appointments.
Calendly